Friday, December 12, 2008

Project Foy - Finishing Step II

Our gameboard is nearing completion. We have been trying a new road surface that seems to be just what I was looking for. I need to do some final finishing steps and then I will share the result. In the meantime, we have been finishing off the detail work and adding details to the board like sandbags around prepared positions and fences. We are also working hard on painting all the buildings for this scenario.

One of the ways to make your boards more intersting an realistic is to add small details. I like to simply take a branch or twig and snap off random pieces, letting them drop to the board. I have also started placing fallen trees in some of the more heavily forested areas. Then I place the plants collected from my yard with lichen and moss in groups that look natural. I try to fill-in areas with lots of foliage rather than placing small clumps everywhere. A wooded skewer works well to make a small hole in the base. I try to trim the foliage so that it forms a natural "stem" that goes into the hole. When that is not possible, a little Tacky Glue does the trick. IN any case, if excess glue squeezes out, I toss some dirt around the hole and then brush off the excess when dry. Here is a wide angle shot of one such area completly finished:


And then a close up of the "fallen trees":


You can see that these little details add a lot to the realism.

The Rapid Fire book gives a great suggestion for creating the wire fences so predominent in NW Europe. Matchsticks can be used along with unshielded copper wire (12 guage is what I used). Cut the matchsticks into 1/2" lengths. Shave one end into a point (makes it easier to push into board - suggestion from John C. from the BF team). Start with one stick and wind the wire around twice just above center. Layout another stick 1"-2" away and wrap the wire around that stick clockwise at approximately the same height. Loop the wire over the stick and wrap the wire around again counter-clockwise. Repeat this procedure for whatever length fence you need and again for the top strand. Finish with a double wrapping on the end post. Make sure all of your "loops" are on the same side of the fence. When you are done, you have a very nice wire fence.


This is a picture of my prototype, it is essentially unpainted. I would finish this section by painting the posts weathered wood (prime flat black, dry brush brown oxide, highlight brick red or light grey, black wash if needed) and then lightly black washing the wire leaving some of the copper exposed.

When I started the project, I did not own any 20 mm buildings. I ordered several buildings from a couple of different suppliers. Sentry Models has some great items but they are expensive and come unpainted (the US distributor also has to order from the UK so lead time can be long). Hovels has my favorite items and they also offer both painted and unpainted prices. Finally, Monday Knight offers what seems to be a re-branding of some of the Sentry line. Their items are inexpensive and delivery was quick. The models are not as detailed (f.e. no interior), but for the price you cannot go wrong. Dave H. from the BH group has been helping me get the painting done on these. For our scenario, there are 11 buildings in all so plenty of painting practice. I may share some of my lessons learned on these after the gameboard is 100% finished.

If you look backwards at some of the earlier posts, you can clearly see how this section of the board has evolved:


Our next post will talk about creating prepared positions like the one you see in the middle of this picture. We will also introduce a "new" (for me) method for creating brick and stone walls. That should just about do it then for the Project Foy gameboard. We have this game scheduled to debut at Little Wars in Lincolnshire, IL the first weekend in February, so look us up if you are in the area and want to see the board close-up.

Wednesday, November 26, 2008

Project Foy - Timeout Result

This past weekend I helped our junior terrain makers finish their school project. Their 6th grade Social Studies assignment was to re-create something from ancient Egypt. Many of the kids picked the obvious "pyramid made from sugar cubes" project, but my son came up with the idea of picking a famous battle from that time period and building a terrain board and rule set for it. He volunteered my help, but I wanted them to come up with the ideas and, more importantly, to do all of the work.

After digging around on Wikipedia for a while, they settled on the Battle of Pelusium in 525 BC. This was a battle for the fortress of Pharaoh Psametik III and took place in the eastern Nile delta. The boys did a great job of doing the research and deciding what the board needed to look like. I can't say that their idea for the fortress exactly matched the historical account, but we all make allowances in our projects to make them fit our time/space/budget.

The boys used a lot of the techniques we have already presented:


Honestly I was not sure what we would do for figures, but I was hoping to find a set of plastic Romans at least to pass off for Egyptian warriors. As luck would have it, our favorite hobby store, Greenfield News and Hobby, had not only Romans, but Egyptians too. We were also able to pick up some cheap palm trees to add character. They look a little cheesy: if we had had more time, I would have gotten the procedure that John uses to scratch build them and had the boys make them. Similarly, the boys ended up only having enough time to mark the bases of the figures to indicate what side they were on. I am hoping they will be interested enough to go back and take a stab at painting them up.

For the Nile River tributaries, I showed them how to blend a variety of colors going from darker to lighter as they moved out from the center. For such an advanced technique, I thought they did a very good job. I finished the river sections off by brushing on Liquid Water after the paint had dried. I just wanted a shiny top-coat. I was not going for the depth that we normally use for rivers and ponds. Overall, I was very pleased with the effort and result.

I did stumble across one new technique as we were trying new things. I found that a Burnt Umber wash over the spackling compound rough coat results in a pretty good river bank. In this case, you want to go easy on the sanding/smoothing.


If we can get it on the schedule, I am going to try and convince my son to run a full-fledged game at Little Wars in February. We play-tested their rules on Saturday night and it seemed to be a reasonable game. But, finally back to Project Foy!!


Friday, November 21, 2008

Project Foy - Timeout

Well, it's been about a week or so since I have had a chance to complete any significant work on Project Foy. My son was assigned a project at school on Egypt and he thought it would be a great idea for his dad to help him make a game board depicting a battle from ancient Egypt. This is a group project so it has meant several sessions of the "project team" coming to our house for the design and build. It has been very interesting to see them go through the same build process that we are.

Originally they came up with a design that covered 4'x5'. Within the Battlefield Hobbies group, we take turns playing the VOR role. That is the "voice of reason". It is funny that even at 11 years old, your project build plans wildly exceed reality in the early planning stages. So, after I stepped in as the VOR (did they realize a board that size takes about 30 hours to build?), their design shrunk to a more manageable 2'x2.5'.

The team has gone through most of the design and rough construction work. This weekend we will put on the final finishing touches. They are also planning on putting together a rule set so they can do a short playtest for the class.

It has been a real experience for me as I step back and allow the boys to create their own vision. I have helped with suggestions and demonstrating techniques, but I am doing my best at resisting the urge to step in and clean up their work. So far, I have limited that to just the most difficult cutting operations.

Anyway, we should be able to get Project Foy back on track next week. I have a series of finishing photos that need to get uploaded before we show the final stages.

Thursday, November 13, 2008

Project Foy - Finishing Part I

The two things that really set a terrain piece off from the rest are the finishing step and detailing. You could very easily place some buildings and model train trees on your rough board and have a reasonable playing surface. We strive to add more realism to our pieces so that you actually feel like you are part of the game. A properly finished game board should introduce elements that make the game more challenging. One of the first games I ever played with what would become the Battlefield Hobbies group was Brecourt Manor. This game board has an elaborate network of trenches. One of the MG positions was so well camouflaged that I did not see it until my squad was taken under Op Fire (even though the figures had been sitting there for nearly an hour). That's what we are trying to achieve.

I probably mentioned this earlier, but I like to use as much natural material as possible. That means my finishing activities start with a trip around the yard. I am looking for anything that will 1) look reasonable at our scale (20mm in this case) and 2) fit in the general geographic area we are modeling. You would generally not see a 50' flowering bush, so you need material with small details. I try not to get too caught up in trying to exactly match floral and fauna, but you certainly would not use a palm tree in Northwest Europe.

Recall our game takes place on Christmas Day. This simplifies the trees that we need, but makes the foliage a bit harder to find. Luckily we are building in the fall so I have been able to find plenty of dormant plants. I have never been very happy with the pre-made deciduous trees so I was pleased to be looking for winter landscape candidates like this:


In general, you will find one or two bushes or trees in your yard that produce the type of look you are after. I find myself picking through a fair amount of trimmings before finding what I am after. Of course, you want to take care to find varying sizes and shapes.

While I am at it, I pick up as much brush-like material as possible. Weeds, rather than actual plants, have been more productive for me. Michael's Art Supply is a store that we have found invaluable. It feels kind of odd browsing around a crafts store (all the employees want to HELP you!), but they have a great selection of lichen and moss. I was able to find two varieties in their floral arrangement area that seem to work great for my winter scene. If you don't have a Michael's in your area, you should be able to find similar products at any arts and crafts store.

For the evergreen trees, I found a spectacular line from Bachmann Trains - SceneScapes. These are somewhat expensive, but the quality is outstanding. I am planning to make the evergreens removable on the board so I can maximize this investment. I am using the snow-covered version for this game. We will probably also use them on an up-coming Winter War series of games. They look kind of strange right now, but once the snow cover is down, the effect should be perfect.

Once you have a nice selection of trees, lichen, moss, and other brush we can start the finishing process. A nice by-product of sifting the dirt earlier is that you wind up with a pile of small rocks. I pick out a few of these and that's where I start my finishing. The rocks are glued down with Tacky Glue (from the art supply store). They need to be randomly placed and grouped. Generally larger rocks can be by themselves while smaller rocks tend to be grouped together in piles. I use enough glue that it squeezes out the side when I press the rocks in. After everything is placed, I go back and sprinkle dirt around the rocks, making sure to cover all the extra glue. Once this dries, you can sweep away the extra dirt and the rocks look more naturally embedded in the soil.

In this shot you can see one of the larger rocks right in the middle of the picture. Notice how it looks nicely weathered and you can just pick out the band of dirt around the base.

Placing trees is the next step. For these, I just start going through the branches I collected and find interesting and varied shapes. You need to try and mix big with small and thick with thin. Remember here too that you are making a gaming table so you need some room for figures unless the area is supposed to be impassable. Once I find a suitable shape, I just break off the branch and snip any outlying pieces. The finished "tree" is then simply pushed into the game board. For the thicker trunks, you may need to actually cut a hole with a hobby knife to avoid the springing effect of the poly board.

Here are a couple shots showing the trees in place:


Once I have the trees placed, I go back and secure them with Tacky Glue into the hole and the same dirt finish as the rocks. I still have not found a reasonable method for trees with leaves. I do not like the look of the ones you can buy. Next summer, I will be on the lookout for a good source in my yard. I'll let you know if I find anything. Next we will go through the final finishing steps ...

Friday, November 7, 2008

Project Foy - Rough Surface Examples

Here are some pictures from the sections I am still working on. The rough surface is almost complete. Only one more small section to go. But this gives you a closer look at the spackled surface before I rough finished it with turf:

This section needs a sweeping before I start with turf to get all of the fine debris off. The section at the very top is already roughed. I will go through the process for creating the trench you see in the middle when we talk about detailing. I guess it probably should have come earlier. Trenches can be created at any time, but it is just easier to have more room when cutting into the boards. On the other hand, I tend to be more careful once some of the finishing is done so I probably do a better job.

Here is a section after sweeping away the extra turf:

And here is a section after the extra soil has been added. This section will be swept one more time to remove any loose material. You will see what this looks like when we start in the finishing section:

This is actually a very nice sequence of pictures. You can see how each step adds a little more depth and realism. This carries into the Finishing steps that we will go into next.

Thursday, November 6, 2008

Project Foy - Rough Surface

Now that we have a prepared surface, we can start to add the actual terrain. What you use for roughing and finishing is going to depend on your scenario. A scenario in heavy woods is going to look a lot different from something in the desert. The materials are generally the same, just different colors. And the process is exactly the same regardless of what the final look should be. I will outline the steps I followed specifically for Foy, but you should be able to apply the same steps to create any look.

Project Foy is played across rolling farmland through several small villages in southern Belgium. The battle itself takes place on Christmas Day, 1944. On this day, there was moderate snow cover, so this will be a winter scene. Given that, you might ask why we did not just stop with the white, prepared surface. The plan at this point is to use model railroad "snow" to cover the entire board after it is given an autumn look. First, I think it will look more natural, as snow rarely covers 100% of an area. Second, I want to try and remove the snow when we are done so that the board can be used for non-winter scenarios as well. Given the time invested, it would be a shame if it were single purpose.

The rough surface on Project Foy is a mix of fine Yellow Turf and fine Blended Turf - Earth. We use Woodland Scenic products:


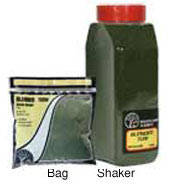
I try to incorporate as much natural material as possible into my boards. So, I also throw in a handful of fine dirt. This is just soil I take from my yard and pass through a very fine screen. A few small pebbles are actually desirable, but I try to get it as fine as possible. It is always easier to go back and place more stones. The mixture proportions are more art than science. Unfortunately, I can give no better advice than "until it looks right". One tool I did use was to take a picture of a small section of my board and compare that against a picture of my backyard in autumn. The overall color balance of the two photos was similar - so I assumed the mix was good.

We have always used standard Elmer's glue as the adhesive for our turf. I pour a generous amount over the area I want to cover and then squirt acrylic paint into the glue. Burnt Umber is a nice undercoat color. The purpose of the color is to hide the spackle and/or foamboard if the turf happens to rub off. It also helps to add a little more color depth to the turf itself. Then I use a paint brush to both mix the color and spread the glue to cover the whole area evenly. The glue dries relatively slowly so you can work over a pretty large area.

When the glue is spread evenly I start sprinkling the turf mixture over the area. The application is fairly thick (at least 1/4" - 1/2" but probably thicker) so you will use a lot of turf mixture. However, you will reclaim most of this mixture later on. Let your initial application sit for 10-15 minutes and you will see that in some areas, the glue has absorbed all of the turf mixture. Simply sprinkle on more turf. Repeat this process until no bare spots are seen. After about 30 minutes, go back through and pat down the turf mixture, taking care not to sweep any of it away at this point. This just gets the mixture nicely embedded in the glue and makes for a more consistent surface. Remember - this is the ROUGH surface, not our finished piece. Now let this dry at least overnight.

Once the area is completely dry, the excess turf needs to be removed. We have used two methods. You can lay a tarp on the floor and simply overturn the gameboard above the tarp - shaking slightly. Or you can use a wide, soft bristle brush to "sweep" off the surface. I am tending to like the second method better. It is a lot easier to reclaim the extra into a small bin at the side of the table by brushing. I also like the distressed look it gives to the turf. You can control exactly how much of the turf you wash out.

I do NOT rely on the undercoat color however to wash out the turf. After sweeping I use a spray-on adhesive to adhere more soil to the board on top of the turf. This takes a little practice, but the idea is to generate random areas where the turf has gotten washed away or never grew. Short controlled sprays from an aerosol can do a remarkable job of this. Then just sprinkle fine dirt over the "puddles" of adhesive and allow to dry overnight. For my board, I also immediately sprinkled a very small amount of the turf mixture on top of the fine dirt and blended them by tapping (not sweeping) the paint brush around the area. This resulted in a very nice blend between the turf and dirt. The final step after drying is to go back over the area with the soft brush to remove any loose dirt or turf (the spraying will pull up some turf).

During this project, I was trying a bunch of different methods so I never roughed out more than a small area. In general though, you will want to rough finish the entire board at one time so you get a consistent surface throughout. I will edit this post later with some pictures from the Foy board of the roughed surfaces I recently finished. Now though, this is where the fun part for me starts - Finishing the surface ....

Tuesday, November 4, 2008

Project Foy - Surface Preparation

Once all of the elevations have been created, it is time to prepare the surfaces for rough finishing. In this stage, we are trying to take all of the rough edges off our transitions. The goal is to make everything look as natural as possible. It helps to start referring back to the pictures you have of your terrain area. When you are done with surface prep, you should be able to visualize the finished piece.


I start with the highest features and work my way down. All of the sharp edges can be smoothed with the Ryoba saw. You do need to be careful when doing this to preserve (or introduce) some randomness. Very little in nature is found with smooth, sharp edges. There are some places though that need to be "less natural". You have to leave enough playable surfaces for figures to stand flat. Try to leave some room for vehicles to go off-road too. It is a fine balance between complete realism and playability.


After smoothing out the rough edges as it were (or roughing out the smooth edges!), we apply a layer of spackling compound to the whole game board. This layer further fills in and smooths out transitions. It also provides a slightly harder shell to protect the soft polyfoam underneath. We use a product called DryDex:


I have heard other people use a two-part compound and still others use a thin Quickcrete mix. The DryDex is probably more expensive than most, but it has always been very workable for me. It also goes on pink and changes to white when it is dry so you can tell exactly when it is ok to start working again.


I have experimented with several different methods for roads. One of the methods was to try spreading a thin layer of spackle and then cut in tire tracks with a dental tool. In the end, I was no happier with this result than any of the others. The resulting roadbed is very brittle. I can easily see the "tire ruts" cracking or chipping during the first game. I am still searching for a method I like. So, I no longer treat the road beds with spackling. They remain bare poly at this point. More on the things I have tried for roads in a later post.


After the spackling coat has dried completely (I usually give it two or three days), it helps to sand the entire board with med-fine to fine steel wool. This is a very very messy operation, but if you skip it, you will find that there are sharp edges to the spackling that snap off and show white over your finished terrain. This again provides that final smooth look to your transitions.


At this point our Project Foy board looked like this:


I could not resist another playtest, this time with a few buildings set in place. Of course, the vehicles are not the right scale or type, but with a little imagination, the game is starting to come together. Now that we have a solid foundation, the finishing work can start ....

Friday, October 31, 2008

Project Foy - Cut Profile And Elevation

Now that we have the terrain outline transferred to our game board, we can begin to contour. There is really no right or wrong sequence to do this, but I tend to start with one corner and work my way around. Contouring involves both adding and taking away material in order to go from a flat board to something that looks more realistic. In the case of Project Foy, you will recall that I had pictures from the actual location. If your wife does not happen to be traveling to your game location, the Internet is also a great source for pictures. In either case, viewing the landscape gives you something to compare your finished product to. In almost all cases you are going to need to sacrifice on distances between landmarks or objects. The idea though is to end up with a reasonable representation of the orginal.

Here is an example of a coutoured board. This is not Project Foy, it is one of the sections from our D-Day game, but in any case the details are the same.


You can see from this picture that we use trimmed polystyrene chunks to build elevation. In this case, we also used some natural material (larger rocks) to add character to the board. This picture actually represents the second step of the contour process. Before the poly chunks are trimmed, we rough fit them in place to make sure the profile will be correct. This is a trial-and-error process. Don't be too concerned if you end up forming a piece a couple times. Once a good profile is acheived, the chunks are glued in place. We use "Liquid Nails" for this purpose. You will get best results if you allow the glue to dry over night before moving on.


The picture below is a good example of taking away material. This is from one of our Queen Anne's Revenge game boards. This will end up being the second dungeon level. In a later post, I will show you how we created basements for the buildings on Project Foy.


You can use just about any tool to cut your contour. A dry-wall saw is good for making rough, long cuts. Finer cuts can be made with a Japenese Ryoba saw (you can see one lying in the upper right corner). We use the type with teeth on two sides. This saw with fine or very fine teeth makes a very precise cut. When coarse steel wool is dragged across the poly board, it makes a nice random terrain pattern. This method can be used (after some experimentation) to make the type of natural column you see in the middle of this picture. We have also gone as low tech as a handsaw or butcher knife.


During this process you might end up covering some of your transfer lines, so be sure you recreate any important features at their final elevation. Our next step will be to rough finish the entire game board ....

Thursday, October 30, 2008

Project Foy - Planning

In order to get started on a scenario, my preferred medium is a spiral bound graph paper notebook. It is perfect for concept drawings and the graph layout allows you to hold an accurate scale. My goal at this point is to get everything down in one place.

Before starting the terrain pieces, my first step is to determine the Order of Battle (or OrBat) for each army (or armies if more than 2). This is a listing of all the units for each side that are needed for the scenario and their associated vehicles and equipment. Again, the Rapid Fire books are great for this because they include a complete OrBat for each scenario. I usually separate the figures and the vehicles into separate OrBats. I can then easily determine which figures/vehicles I have and which need to be purchased.

The next step is to plan the terrain pieces. I start this process with a checklist. Here are the basic steps:


The first thing I do is create a scale drawing of the terrain design. The terrain design generally comes out of a scenario book. In this case, Project Foy will be played on a 6'x5' game table (4 sections each 2.5'x3'). Based on this size, each graph square on my drawing represents 2.9". It is not necessary to be absolutely precise in the scale drawing because you will want to make adjustments as you are transferring the design any way.
Here is the scale drawing:


From the drawing, I start identifying the co-ordinates of key points. You can see those notations on my drawing. You can identify corners of buildings, intersections of roads, and inflection points on terrain features or roads. Then it is simply a matter of plotting those same points on the game table. All of our boards start with a 2" polystyrene foamboard base. I added dotted lines to the drawing which represent the board edges. This helps to provide perspective as the design is being transferred.

Once I have enough key points plotted, Sharpie markers are used to fill in the design details. It is helpful to use different colors for different features. I use green for wooded areas, blue for water, red for structures, orange for roads, and brown for changes in elevation. At this point, your board design should look roughly the same as your scale drawing. I can rarely resist the temptation to playtest before starting the actual terrain work. This impatience actually serves a purpose. It is easy to spot places where you potentially want better cover or a smoother surface or more obstacles, or just plain something else. This is where you use your experience running games to tweak the final design.

I also note the elevation change for each brown area. We use a combination of 1" and 2" foam for the changes, but more about that in the next post .....

Wednesday, October 29, 2008

Project Foy

I am going to be starting a series of posts related to a new project the Battlefield Hobbies team is undertaking. At last year's Little Wars convention, Dave Himm from BfH introduced us to the newest Rapid Fire publication, Battle of the Bulge. We have used the Rapid Fire rule set for a number of our convention games and have always had positive feedback. It seemed to all that this would be a unique opportunity for a new set of games. We all voted on which scenarios we would like to build and the Christmas Day battle at Foy Notre-Dame Belgium won out.

Project Foy, as it is being referred to by us internally, will have it's inaugural run at Little Wars 2009. I will need to backtrack a little bit since the game board is approaching 50% completion, but I intend to walk through our game building process from start to finish.

The very, very start is usually a brainstorming session in a hotel lobby at the end of a long day of convention gaming. We try to plan out which conventions we will attend and games for each convention at least a year in advance. A lot of times these are just rough details. Once we all get back home, the creativity starts. Ideally, we are all working on different projects so that we have a variety of games to choose from for each convention. As much as possible, we try to follow the stated theme for each convention. NavCon for instance is naval wargaming, so we choose only nautical themed games.

Right now, Dave is working on a number of Victory at Sea scenarios. John is just putting the finishing touches on our second full fledged rule set, No Quarter Given. He is also developing a plan for packaging the rule set with all the necessary game materials and offering the result for sale. That leaves me to work on Project Foy.

The nice thing about the Rapid Fire books is that they fully detail their scenarios so you can dive right in to building. Research can be kept to a minimum. As chance would have it, my wife was travelling in Europe on business as we started the project and was only about 120km from Foy. I convinced her to drive up on a Saturday and take a bunch of pictures of the town and the surrounding countryside. She even brought back some misc. rocks and things so our Foy game board will have elements of the actual site!

Most of our game boards to this point have been created as 4'x8' sections. This makes the materials easy to find, but really limits us when transporting. Project Foy marks the first time we will try 2.5'x3' sections. This particular board will be 4 sections total (5'x6' in the end). I will spare you the messy process of cutting down full size materials to the smaller sections, so this is where the project really starts ......

Tuesday, October 28, 2008

Politics In Gaming

As I was browsing The Miniatures Page Convention message board, I came across a post announcing the formation of an HMGS - Deep South chapter. I am not going to cross post the link because after I was done reading it, I was disappointed in myself for wasting the better part of an hour in the excruciating detail of how politics within an organization can poison our gaming environment. In the end, shouldn't these organizations be more focused on what makes a good convention experience for the GM's and players?

From this perspective, I have found that in many cases the mid-size cons get it right. At the larger cons, it is easy to get lost in the shuffle. Smaller cons often do not have the bandwidth to provide the little extra details that make our experience memorable. Our group was recently lucky enough to participate in a great example of convention organization done right - RockCon 2008.

Right from the start, the organizers went out of their way to make us feel welcome. Upon check-in, the badges for all of our team members were ready and waiting, no big deal, all conventions do that - the added touch was that our badges were grouped together next to the general attendee preregs. We were pleasantly surprised to see that the organizers has taken the time to download our logo and display it on the badge. They also put our group name along the bottom of the badge where you normally see a registration type (Fri/Sat/Sun/Weekend). This sounds insignificant, but for a group trying to publicize themselves, it is a much appreciated touch.

After sitting down and looking over the table assignments we found that the organizers had went through the trouble of scheduling all our games for the weekend on only three sets of tables (essentially next to each other). This meant that we could set up in one area and we did not have to lug all of our supplies around the show floor. In fact, after I had been sitting there awhile, the Con Director stopped by and apologized for allowing another game to be scheduled on a set of tables that were adjacent to ours during one of our Saturday sessions! She had hoped to give us additional setup space but could simply not spare the tables.

As the weekend progressed, our games were going off fabulously. Even a game that was mistakenly put in the wrong slot in the PEL was efficiently rescheduled. The reschedule notice that was posted drew a full roster of players (14) for the game. The capper for us though was cake. We were in the middle of our main event on Saturday night when an announcement was made that birthday cake was available to celebrate the xxth anniversary of the Con. A short while later, and without prompting, the Con Director came over to us and asked what flavor cake we would like. She promptly delivered cake to our entire team!

So does it take cake to make a great convention environment? No - but it does take a convention staff that truly appreciates the players and GM's for without whom they would not be in business. A little "cake" goes a long way in this regard.

Monday, October 27, 2008

Rule Set Copyright

I have been doing some checking on copyright laws. The main points I found are:

Publication or registration in the Copyright Office is NOT required to secure copyright. Copyright is secured automatically when the work is created, and a work is “created” when it is fixed in a copy for the first time. “Copies” are material objects from which a work can be read or visually perceived such as books, manuscripts, or videotape. A copyright is ordinarily given a term enduring for the author’s life plus an additional 70 years after the author’s death.

Publication is no longer the key to obtaining federal copyright as it was under the Copyright Act of 1909. However, publication remains important to copyright owners.
The 1976 Copyright Act defines publication as follows: “Publication” is the distribution of copies of a work to the public by sale or other transfer of ownership, or by rental, lease, or lending.

The use of a copyright notice is no longer required under U. S. law, although it is often beneficial. The use of the copyright notice is the responsibility of the copyright owner and does not require advance permission from, or registration with, the Copyright Office.

The notice for visually perceptible copies should contain all the following three elements:
The symbol © (the letter C in a circle), or the word “Copyright,” or the abbreviation “Copr.”
The year of first publication of the work
The name of the owner of copyright in the work, or an abbreviation by which the name can be recognized, or a generally known alternative designation of the owner
The author or copyright owner may wish to place a copyright notice on any unpublished copies that leave his or her control.

Example: © 2008 John Doe
Example: Unpublished work © 2008 Jane Doe

There is no such thing as an “international copyright” that will automatically protect an author’s writings throughout the entire world. Protection against unauthorized use in a particular country depends, basically, on the national laws of that country.

In general, copyright registration is a legal formality intended to make a public record of the basic facts of a particular copyright. However, registration is not a condition of copyright protection. The copyright law provides several inducements or advantages to encourage copyright owners to make registration. Among these advantages are the following:

Registration establishes a public record of the copyright claim.
Before an infringement suit may be filed in court, registration is necessary for works of U. S. origin.
If made before or within five years of publication, registration will establish prima facie evidence in court of the validity of the copyright and of the facts stated in the certificate.If registration is made within three months after publication of the work or prior to an infringement of the work, statutory damages and attorney’s fees will be available to the copyright owner in court actions. Otherwise, only an award of actual damages and profits is available to the copyright owner.

Registration may be made at any time within the life of the copyright. Unlike the law before 1978, when a work has been registered in unpublished form, it is not necessary to make another registration when the work becomes published, although the copyright owner may register the published edition, if desired.

Mandatory Deposit requires the owner of copyright to deposit in the U.S. Copyright Office for the use of the Library of Congress two complete copies of the best edition within 3 months after a work is published. The registration process satisfies this requirement.

Full instructions for submitting a registration can be found at http://www.copyright.gov/circs/circ1.pdf

The cost is $35 per submission.

RockCon 2008 After Action Reports

I am interested in your After Action reports from RockCon 2008.

Sunday, October 26, 2008

RockCon 2008

We have posted the pictures from our RockCon 2008 games at picasa.com

Check them out!