Project Foy is played across rolling farmland through several small villages in southern Belgium. The battle itself takes place on Christmas Day, 1944. On this day, there was moderate snow cover, so this will be a winter scene. Given that, you might ask why we did not just stop with the white, prepared surface. The plan at this point is to use model railroad "snow" to cover the entire board after it is given an autumn look. First, I think it will look more natural, as snow rarely covers 100% of an area. Second, I want to try and remove the snow when we are done so that the board can be used for non-winter scenarios as well. Given the time invested, it would be a shame if it were single purpose.
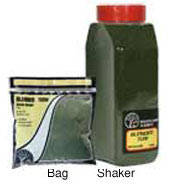
The rough surface on Project Foy is a mix of fine Yellow Turf and fine Blended Turf - Earth. We use Woodland Scenic products:
 I try to incorporate as much natural material as possible into my boards. So, I also throw in a handful of fine dirt. This is just soil I take from my yard and pass through a very fine screen. A few small pebbles are actually desirable, but I try to get it as fine as possible. It is always easier to go back and place more stones. The mixture proportions are more art than science. Unfortunately, I can give no better advice than "until it looks right". One tool I did use was to take a picture of a small section of my board and compare that against a picture of my backyard in autumn. The overall color balance of the two photos was similar - so I assumed the mix was good.
We have always used standard Elmer's glue as the adhesive for our turf. I pour a generous amount over the area I want to cover and then squirt acrylic paint into the glue. Burnt Umber is a nice undercoat color. The purpose of the color is to hide the spackle and/or foamboard if the turf happens to rub off. It also helps to add a little more color depth to the turf itself. Then I use a paint brush to both mix the color and spread the glue to cover the whole area evenly. The glue dries relatively slowly so you can work over a pretty large area.
When the glue is spread evenly I start sprinkling the turf mixture over the area. The application is fairly thick (at least 1/4" - 1/2" but probably thicker) so you will use a lot of turf mixture. However, you will reclaim most of this mixture later on. Let your initial application sit for 10-15 minutes and you will see that in some areas, the glue has absorbed all of the turf mixture. Simply sprinkle on more turf. Repeat this process until no bare spots are seen. After about 30 minutes, go back through and pat down the turf mixture, taking care not to sweep any of it away at this point. This just gets the mixture nicely embedded in the glue and makes for a more consistent surface. Remember - this is the ROUGH surface, not our finished piece. Now let this dry at least overnight.
Once the area is completely dry, the excess turf needs to be removed. We have used two methods. You can lay a tarp on the floor and simply overturn the gameboard above the tarp - shaking slightly. Or you can use a wide, soft bristle brush to "sweep" off the surface. I am tending to like the second method better. It is a lot easier to reclaim the extra into a small bin at the side of the table by brushing. I also like the distressed look it gives to the turf. You can control exactly how much of the turf you wash out.
I do NOT rely on the undercoat color however to wash out the turf. After sweeping I use a spray-on adhesive to adhere more soil to the board on top of the turf. This takes a little practice, but the idea is to generate random areas where the turf has gotten washed away or never grew. Short controlled sprays from an aerosol can do a remarkable job of this. Then just sprinkle fine dirt over the "puddles" of adhesive and allow to dry overnight. For my board, I also immediately sprinkled a very small amount of the turf mixture on top of the fine dirt and blended them by tapping (not sweeping) the paint brush around the area. This resulted in a very nice blend between the turf and dirt. The final step after drying is to go back over the area with the soft brush to remove any loose dirt or turf (the spraying will pull up some turf).
During this project, I was trying a bunch of different methods so I never roughed out more than a small area. In general though, you will want to rough finish the entire board at one time so you get a consistent surface throughout. I will edit this post later with some pictures from the Foy board of the roughed surfaces I recently finished. Now though, this is where the fun part for me starts - Finishing the surface ....

No comments:
Post a Comment